How it works
1
Connect power and HDMI cable to the back of the Exputt Camera
2
Install the camera by using the camera stand or attach it to TV
3
Press the power button on the back of the EXPUTT camera for about 2 seconds until the LED light at the side of the camera lights up.
4
Press the power button on the back of the EXPUTT camera for about 2 seconds until the LED light at the side of the camera lights up.
⚠ Please do not place any objects, including balls or putters, on the mat while the program is searching for the mat.
If the putting mat does not show up on the screen properly, you can move or rotate the camera so that it faces the putting mat.

⚠ Please do not place any objects, including balls or putters, on the mat while the program is searching for the mat.
5
Check the height of the camera and the distance between the camera and the putting mat

6
Follow the instruction from TV screen and when syncing is done, use your remote controller and press 'OK'
⚠ In order for the Exputt camera to identify the putter movement, you need to provide proper lighting.

7
Use the putter like a mouse (during challenge or play mode)

Putter mouse operation area
As you move the putter within this area, you will see the mouse pointer on the screen moving.
⚠ Please don't place other objects in this area, so the camera can read only the putter's position

Putting ready area
As you place the ball in the area, you'll hear the voice "Ready" which means the ball is placed in right place. Red X will appear when ball is moved from this area.
⚠ Please don't place other objects in this area, so the camera can read only the putter's position

Hint key
On the practice 2 or game modes, the hint key shows the recommended putting lines towards the hole. Only functions when the ball is in the putting area (ready status) You can also use the remote controller to select this option

Direction key
Used in game or practice 2 menu in order to adjust the putting direction to the left or right. Only functions when the ball is in the putting area (ready status). You can also use the remote controller to select this option
⚠ If you tap with the middle of the putter face, Exputt camera might not recognize its movement since the camera reads the putter's heel and toe positions.
⚠ If your putter face is dark, you might need to stick the included stickers on the heel and the toe of the putter face. (Or, you can use any 0.5" round shaped stickers)


During mouse operation, please angle the putter so that the face, with stickers, is facing the camera.
8
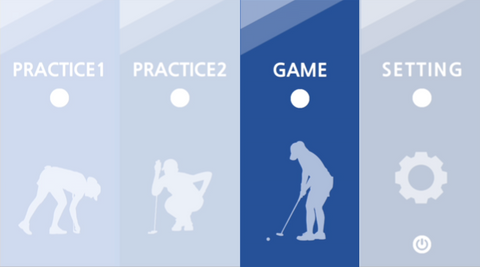
From the main menu, you can play in 3 different modes: practice 1, 2 or game. You can set different configuration on the setting menu


Practice 1
Practice green. You are able to practice your sense of distance on a smooth, flat green. You are able to select three practice greens which have no slopes. In the case of target distance, this can
also be selected through 3 distance modes - Fixed, Random, Increase. You will be able to find out information on the speed, path and impact angle of the putter, as well as the speed and direction of the ball. You can refer to these to improve
consistency of your putting stroke.


Practice 2
You can choose one of the four 9-hole courses and practice putting towards a hole. In this mode, you are able to practice and refine your sense of distance as well as practice putting in a sloped
green. Read the slope of the green using the movement of water drops moving through the grid. Comparing your target line and what the program recommends is also a good practice.


Game
A maximum of four people can play a putting game through game mode. The player name is automatically set to Player 1, Player 2, Player 3 and Player 4. You can select one of the four 9-hole courses, and
game proceeds in stroke play. Player 1 starts putting and when Player 1 gets a concede/hole-in, Player 2 will start putting for the next.

